You see, having never really hibernated this year but having still built up a not insignificant case of seasonal cabin fever (the days are still quite short, after all), I have started thinking about my vacation plans for the year. The Co-owner and Co-pilot Egg have already made plans for Spring Break, but those plans don't include me. After a couple of years of Egg and I going to Oshkosh and leaving the Co-owner at home to take care of the estate grounds and the herds of domesticated quadrupeds, it is her turn to take a solo trip with the soon-to-be leaving the nest co-pilot. These things are planned with an almost stunning mathematical precision hereabouts, and the scientifically deduced calculation that is at play here seems to be:
Oshkosh x 2 = Bahamas.
Fair enough. They both love the beach, and the all-inclusive meal plan is always attractive. For me, though, I prefer something a little more active. I think this is the year that I will do something that I've been hoping to do for the last three years: I'm planning on attending a 7-day live-aboard sailing school.
I had looked at this before, but it was at a school located up around Cleveland. This year I did some more research and found a very highly reviewed place down in Ft. Lauderdale. It seems to me that the Florida scenery and sailing on the ocean might be more interesting than Lake Erie. And really, do I really need to go to Put-in-Bay again?
A Week of Learning, a Lifetime of Adventure
Blue Water Sailing School is an American Sailing Association certified sailing school with lessons for sailors at every experience level. Our week-long, live-aboard cruising and sailing courses give dedicated students the experience and confidence to achieve their dreams of nautical adventure. We’re based in Fort Lauderdale, Florida and have additional locations in Rhode Island, the Virgin Islands, and The Bahamas.

We’re one of the only sailing schools in the United States to offer sailing certification at every level of the American Sailing Association curriculum, andthey’ve given us the ASA’s Outstanding School award five times. Sailing education is all we do — with our specialized approach, you can be assured of the finest training available.
At the end of the week, I should be certified to be able to do bareboat charters, which is like saying "I will be able to rent a car" rather than "I'll take a taxi."
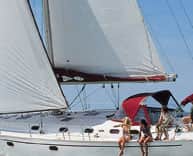
The standard class at Blue Water is done in a 51' monohull:
Dufour Gib’Sea 51: Gitana

The same spacious interior that makes the Gib’Sea 51 popular with charter companies also provides a good teaching environment. With three double cabins, two more doubles that convert into bunks, and five heads this yacht has enough room to serve our larger classes without feeling cramped.
Location - Fort Lauderdale
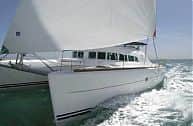
For a number of reasons, I'm opting for the catamaran class, which offers an additional 'Catamaran' certification and the additional benefit of living out the week on a more comfortable boat.Lagoon 410: La Bamba

The Lagoon 410 features panoramic views from its roomy central cabin and has four double berths, each with its own private head. The 41-foot, dual-hull design is a stable non-heeling platform well suited to beginning sailors. With speed and excellent pointing ability that are sure to thrill, the Lagoon 410 also has plenty to offer the more experienced sailors in our intermediate and advanced cruising catamaran courses.
Location - Fort Lauderdale
That's all months (and quite possibly a few snow/ice storms) away, so for now I am still focusing on building an airplane. While the days are still pretty short, they are getting long enough to allow for an hour or so of well-lit work in the late afternoons when I get home from the diamond mines. The most recent job was to install the propeller and start working on the spinner.Van's helpfully placed little tick marks on the circumference of the aft part of the spinner which will presumably be used when it comes time to drill through the spinner and into the back plate. Those marks need to be duplicated to the inside of the spinner.
Once that's done, a good half inch of fiberglass has to be trimmed away from the aft edge to reach a scribe line molded in at the factory. I made the first major cut using tin snips, of all things. I didn't want to go all the way to the scribe line because snips make a notoriously messy cut at the edges.
At that point, I wanted to use the Dremel to finish up the trimming, but it was at home. On to hanging the prop, then.
The Van's plans are only mildly useful for the actual installation of the prop, referring instead to the instructions that were included with the prop. That makes sense, although I was momentarily confused as to which of them, Van's or Sensenich, was supposed to have supplied a set of spacers. In the end it turned out to be Van's. Conversely, these bushings were provided by Sensenich:
Notice the ugly white goopy stuff? That's anti-corrosion protection put on the engine by Rotax. I've left it on there to.... prevent corrosion. If you look closely, you will see that it was applied somewhat spottily and corrosion has, in fact, started to set in.
The back plate needs to be marked along the center line of its circumferential flange, also presumably for later orientation of the spinner attachment screws. I used a Sharpietm marker propped (heh!) up to suitable height with some scrap metal:
From there it is just a matter of bolting in the back plate and the back half of the prop hub. There are twelve bolts provided by Sensenich; it is the shorter of the two bolt sizes that is used for that step. Then the blades are fitted into the hub and the front half of the hub is bolted on, along with another spinner plate. This uses the longer Sensenich bolts and the aforementioned bushings provided by Van's.
That was the end of the workable light for the evening, so the following night I went back to finish up the trimming of the spinner. I carved off the remaining area under the scribe line, using the trusty Dremel and a reinforced cutting disk.
Not surprisingly, slots needed to be cut into the spinner to allow the prop blades to fit through. The cut lines are conveniently provided by Van's. The plans suggest using a fine tooth hacksaw blade to make the straight line portion of the cuts. I used masking tape to provide a nice sight line for the cut.
I started with the hacksaw.... we'll see later that I didn't use it for very long.
The curved areas area prepped for cutting by drilling small holes just inside their outer perimeter. Van's suggest either a plexi bit or a Unibit for this. I went with the Unibit.
The dead giveaway that I didn't use the hacksaw is visible in the lower right corner of the above picture. I was in a bit of a quandary. The hacksaw was proving to be hard to control well enough to ensure a straight line, so I used the Dremel instead. This decision may cause issues further down the road, though. The cut-out pieces of fiberglass may be used later to fill in the gaps behind the prop blades, and the much wider kerf of the Dremel cutting disk versus that of the hacksaw may create an unsightly gap.
That's a problem for later; for now I proceeded with the clean-up sanding of the circular cut-out area. That was as simple as wrapping a piece of sandpaper around a big metal socket and enjoying a few moments in the waning afternoon sun, serenaded by the sound of barking seals. Well, at least that's what it sounded like as a scraped the sandpaper over the edge of the spinner.
And there it is!


No comments:
Post a Comment